Doing Carpet Flooring The Right Way
Want to spruce up a room and give it a new look? Give it a try to install a new carpet! Carpet installation is a great way to cover up old flooring and make any room cozy. There are different types of carpets available for different types of flooring. You have many carpet flooring options if you have vinyl or laminate flooring.
Carpeting can be a fun and rewarding DIY project that will give your home an upgraded look. Whether you go with wall-to-wall carpet flooring or a custom rug, the installation process is the same. Read on to learn how to install carpet flooring in 6 easy steps.
Steps For Installing Carpets
There are different carpets available in the market but choose the one that is suitable for your home and is of quality, such as shaw carpet, dream weavers, and many more that provide excellent durability and quality. So you don’t have to worry about installing carpet flooring.
Here are six steps to install your new carpet:
Measure Your Room
When preparing for a carpet installation, the first step is to measure your room. It’s best to use a tape measure and get length and width measurements of each wall in the space you are installing your carpet. Once you have your measurements, create a diagram that includes all furniture and doors so that when you select supplies, you know exactly what materials will be needed for the job.
At this point in the process, things like the amount of carpet padding or the number of adhesive tacks may need to be calculated. When purchasing materials, always get more than what is estimated to allow for flexibility during the installation process.
Additionally, you should inquire not only about the type of product being used but also where it was manufactured and by whom; using quality materials can make all the difference in your finished product. Taking accurate measurements and knowing what other materials are necessary are essential components in planning a successful installation!
Prep The Room
Preparing the room for a new carpet installation is one of the most important steps in the process. The first step for successful carpet installation is to address any potential issues with your subfloor, including unevenness, plumbing leaks, or damage from water. If these issues are not corrected beforehand, your new carpet may not lay correctly, and it will be more vulnerable to unsightly buckles and lumps.
You’ll need to remove your baseboards or molding before you lay out the adhesive and secure your tackless strips along the perimeter walls, so your new carpets won’t start rippling after a couple of months. Make sure to also clear away any furniture in the room before starting. All of this prep work must be done right, as it is essential for achieving maximum results in terms of durability, comfort level, and aesthetics of your newly installed carpets.
Install Tack Strip
Installing tack strips is another crucial step in carpet installation. It provides a strong foundation for the carpet, rests tightly against the wall, and holds it in its place. The first step begins with measuring the desired area and then cutting the strips to size.
Tack strips come in various sizes but usually range from 3-4 feet long. Depending on the room shape and layout, it may be necessary to use multiple strips, spacing each one optimally apart. Once cut, use adhesive to attach them along the perimeter or any walls that adjoin your main carpet area.
Then position them securely onto the subfloor, pressing down firmly until they adhere completely and remain fastened into place without any movement. Let the adhesive cure properly before continuing your installation process – this may take several hours, depending on what type of adhesive you use! With tack strips appropriately installed, your carpets should remain firmly attached right where they belong – no more bumps or wrinkles will bother you ever again!
Install The Carpet Underlay
Once the room has been fully prepared for installing the carpet, it is time to install the underlay, which is an important step as it prevents moisture from reaching your flooring, prolongs the life of your carpet, and adds comfort. For this process, you will need a synthetic fiber underlay and tools such as a sharp utility knife, staples and stapler gun, tape measure, and steps creaser. Lay out your rolls of underlay in the same direction according to the room layout to avoid overlapping them.
Start at a corner of the wall, then evenly unroll the first roll along two walls meeting in one corner, making sure that each row fits perfectly – with no bumps or gaps – before using a staple gun to fix it firmly in place. Repeat the process until all sections are completed.
After installing underlay, double-check all areas where seams meet, and ensure that they fit tightly and securely against one another with no gaps or irregularities before finally laying your carpet on top.
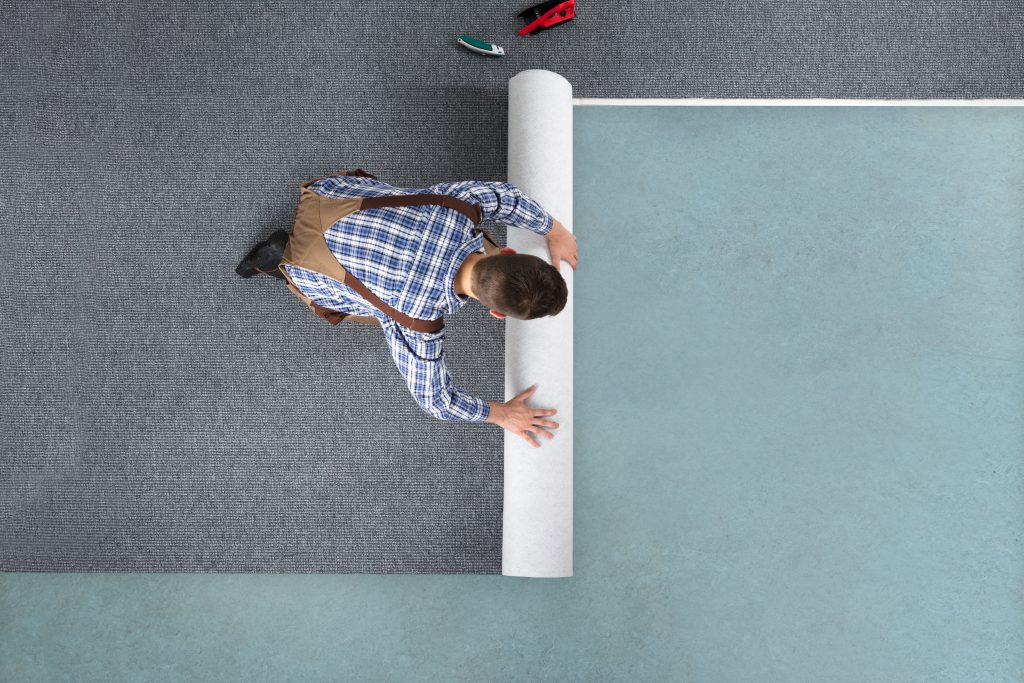
Cut And Lay The Carpet
After properly installing the underlay, the next step in carpet installation is to cut and lay the carpet. Start by finding and marking the center of each wall so you have a guideline when laying out the carpet. Then take a chalk line and snap it along that line, running parallel to your longest wall. Take care to make sure this line is as straight as possible.
Once you’ve laid down your baseline, begin cutting strips of carpet to run perpendicular across it, making sure each strip meets flush with the previous strip and that sections are laid in the same direction.
For seams, apply seaming tape along them after securing them with a knee kicker before closing them with a power stretcher for optimal adhesion. Finally, use a steaming iron following the manufacturer’s directions to eliminate any visible wrinkles after installation.
Stretch The Carpet
Once you have the carpet laid out and trimmed to size, it’s time to stretch it properly so that everything looks neat, tidy, and wrinkle-free. You’ll need a few tools for this step, including a knee kicker designed to push the edges of the carpet tightly into place.
Attach the toothed end of the knee kicker to one corner of the carpet, give it a few solid hits with your knee or leg, and then use a power stretcher – basically an extended version of a knee kicker – set up in three-foot increments along with wall holding up the rest of the carpet evenly.
Wherever there are cutouts or obstacles in the room, like doorways or around furniture legs where you need to fit smaller pieces of carpet in place, you’ll have to do it by hand using scissors and some extra strength glue. Installers generally start from the center point of each room and work their way outwards when cutting openings for irregularly shaped objects.
Conclusion
Installing a new carpet doesn’t have to be complicated! With these six easy steps, anyone can do it themselves—allowing them to get beautiful results! So gather all necessary supplies beforehand, then follow these instructions closely—before long, you’ll have brand new carpets adorning every corner of your home!
If you are still trying to decide about doing it by yourself, then contact Ottawa Diamond Flooring today to learn more about buying and installing carpet flooring without spending too much on carpet flooring costs. Get started now!
